
Knitting Therapy
Christmas is once again upon us but we are all getting a sense of deja vu. When we finally thought that we could put 2020 and 2021 behind us, we ended up with curse rather than a gift for Christmas.
Knitting Therapy
Christmas is once again upon us but we are all getting a sense of deja vu. When we finally thought that we could put 2020 and 2021 behind us, we ended up with curse rather than a gift for Christmas.

Opulent Comfort
I recently acquired a beautiful antique regency Sussex chair. Although it was a bargain, the rush seat had completely disintegrated. As I had time on my hand, I decided to learn rush weaving and renovate the chair myself. After several
Opulent Comfort
I recently acquired a beautiful antique regency Sussex chair. Although it was a bargain, the rush seat had completely disintegrated. As I had time on my hand, I decided to learn rush weaving and renovate the chair myself. After several

A Lesson On Failure.
Failure seems to be something that is frowned upon and treated as an embarrassment and as something that sets you back for life. But there is another philosophy in thinking that failure actually enables growth and change. Failure is also
A Lesson On Failure.
Failure seems to be something that is frowned upon and treated as an embarrassment and as something that sets you back for life. But there is another philosophy in thinking that failure actually enables growth and change. Failure is also
What Is A Sleeve?
Recently I had to prepare a lesson to show my students the versatility of pattern cutting and using it as a start for the design process. For a very long time, pattern cutting had come quite easily for me as
What Is A Sleeve?
Recently I had to prepare a lesson to show my students the versatility of pattern cutting and using it as a start for the design process. For a very long time, pattern cutting had come quite easily for me as

Biker Chic
It has been ages since I have last updated my website so apologies for the sudden disappearance. These couple of years seems like a whirlwind with a major move from a place I had called home for decades to a
Biker Chic
It has been ages since I have last updated my website so apologies for the sudden disappearance. These couple of years seems like a whirlwind with a major move from a place I had called home for decades to a

Working Within Constraints
I love antiques and will always choose old rather than new because of the history behind each item. Often my partner and trawl antique and charity shops for ‘hidden gems’, and my bedtime routine regularly includes scrolling online sites to
Working Within Constraints
I love antiques and will always choose old rather than new because of the history behind each item. Often my partner and trawl antique and charity shops for ‘hidden gems’, and my bedtime routine regularly includes scrolling online sites to

Starting Point
One of the questions I’m often asked is, ‘Where do you even begin?’ Unfortunately, the answer is quite specific to who we are as a designer. In education, we always ask the student about their personal identity, their point of
Starting Point
One of the questions I’m often asked is, ‘Where do you even begin?’ Unfortunately, the answer is quite specific to who we are as a designer. In education, we always ask the student about their personal identity, their point of

Is It Healthy?
Is it healthy? The question to our relationship with fashion and garments. Sadly, we all know the answer. Fast fashion has contributed to a climate emergency within the fashion industry, and being one of the most polluting industries we are
Is It Healthy?
Is it healthy? The question to our relationship with fashion and garments. Sadly, we all know the answer. Fast fashion has contributed to a climate emergency within the fashion industry, and being one of the most polluting industries we are

Modular Construction
The expression ‘It never rains but it pours’ is the best analogy for what has been happening in my life at the moment. The sudden passing of my tutor and good friend meant that I was was left to pick
Modular Construction
The expression ‘It never rains but it pours’ is the best analogy for what has been happening in my life at the moment. The sudden passing of my tutor and good friend meant that I was was left to pick

Back To Basics
It has been such a joyous occasion for me recently. Both my mom and sis are here in the UK for a visit after 3 long years of being apart due to the pandemic. It is only right that I
Back To Basics
It has been such a joyous occasion for me recently. Both my mom and sis are here in the UK for a visit after 3 long years of being apart due to the pandemic. It is only right that I

But It’s 400 Thread Count.
I was changing the bed sheets a while ago and noticed that it was worn and torn in the middle. It was such a shame as the damage was only isolated to a small part and throwing an otherwise, perfectly
But It’s 400 Thread Count.
I was changing the bed sheets a while ago and noticed that it was worn and torn in the middle. It was such a shame as the damage was only isolated to a small part and throwing an otherwise, perfectly

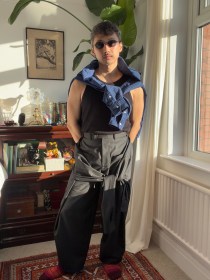
How High Can You Go?
This is the running joke about high waisted trousers and for me, the waistband had always fluctuated between high and low but recently, I decided to go higher. When pattern cutting, the waistline usually sits below the belly button for
How High Can You Go?
This is the running joke about high waisted trousers and for me, the waistband had always fluctuated between high and low but recently, I decided to go higher. When pattern cutting, the waistline usually sits below the belly button for

More of the Same BUT Better!
A while ago, I decided to experiment during the lockdown and made myself an Elizabethan shirt (see here). It was not an ordinary thing that anyone would have wanted but I had the fabric and the time so I decided
More of the Same BUT Better!
A while ago, I decided to experiment during the lockdown and made myself an Elizabethan shirt (see here). It was not an ordinary thing that anyone would have wanted but I had the fabric and the time so I decided
